|
Columns | Projects | Reviews |
|
George Ross, August 4, 2008
I started off trying the 690 MHz core 1148 MHz (2296 DDR) memory clocks that the Catalyst OverDrive Utility maxed out at, but they did not work. GPU-Z would only report the memory working at 1125 MHz so that was all that the BIOS would allow me to run so I changed the memory to 1125 MHz and tried the core at 690 MHz again, but it still crashed. After lowering the core speed I found that 674 MHz was as high I could go without playing with the voltage. After looking though some forums I found that the highest voltage one could set with the BIOS was 1.2V. This allowed the HD 4850 to clock above 674 MHz. Up to 1.4V can be achieved by 'pencil mod'. The link is here. So after using 1.2V I noticed that the voltage regulators were putting off a little heat. This is probably why Sapphire decided to cool the voltage regulators on there HD 4850 "TOXIC" edition.
With this setup is was able to get the HD 4850 all the way up to 728 MHz core and complete my round of benchmarks without error, but when it came to the eight hour Unreal Tournament 3 botmatch that I used to test stability the driver would report that it had recovered from a crash after the match was complete. That stopped happening at 710 MHz and that is how I arrived at my final clocks.
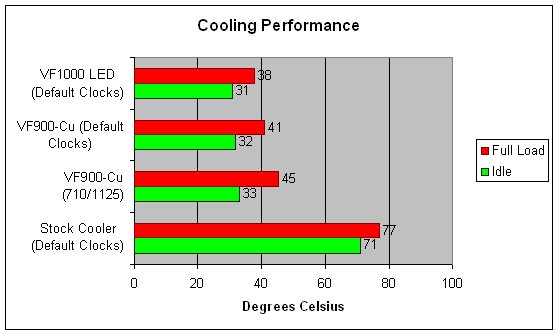
Now mind you these results are using the Tech Station from HighSpeed PC. Installing this into a case will yield higher temperatures because of less airflow. As I have been reminded when using better cooling methods more heat is extracted and needs to be expelled therefore make sure your case has adequate airflow.
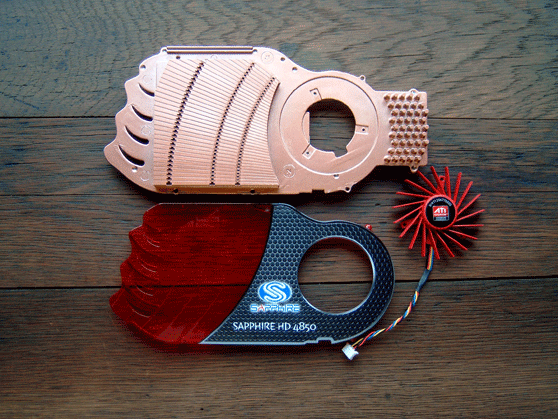
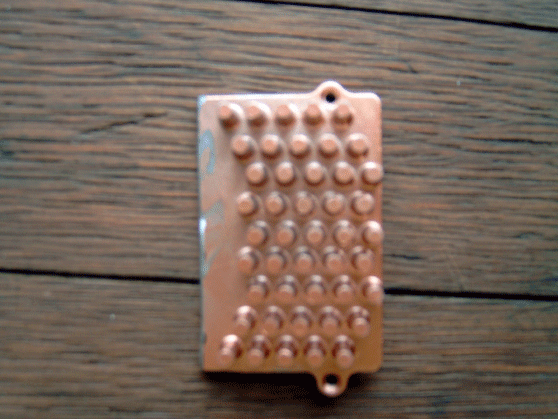
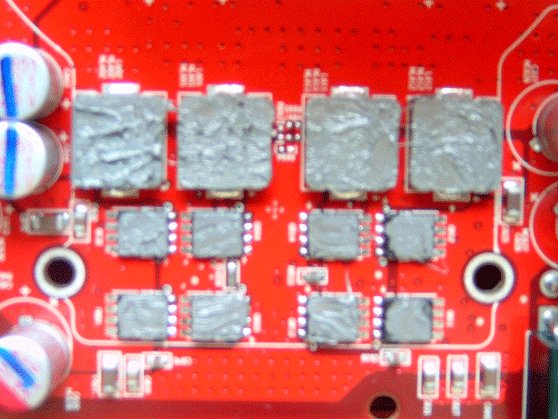
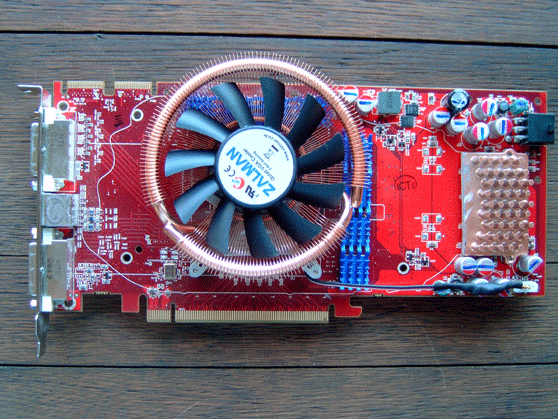
The first step in achieving the fine touches is to completely disassemble the stock cooler. Next cut off the voltage regulator portion of the stock cooler there is a visible line indicating where to cut on the underside. I used a dermal tool with a cutting wheel to cut mine. Next apply some sort of thermal grease to the voltage regulators (In this case I used Artic Silver 5) and attach the cutoff piece of heatsink using the screws that come with the stock cooler.
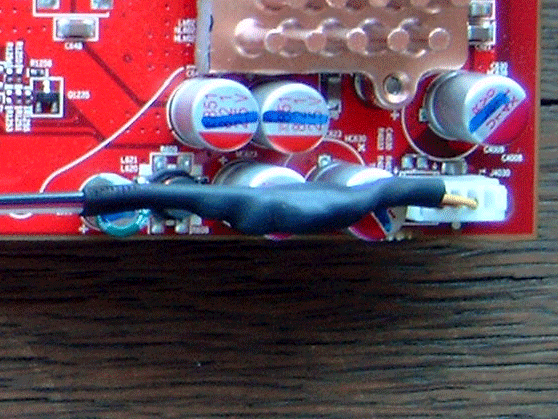
In order to get the fan to connect to the video card you will have to cut the fan connector off of the stock fan and splice it to the VF900-Cu's fan in some manner. I chose to cut the wire to length and solder the splice and insulating each conductor with electrical tape and covering it with heat shrink. The splice is to be connected black to black, red to red, and white to yellow. The stock connector has an additional colored conductor colored blue that I removed from the connector using the tip of a knife.
| Processor | Intel Core 2 Quad Q6700 | |
| Motherboard | GIGABYTE GA-P31-S3G | |
| Memory | GeIL Evo One 4GB DDR2 1066 (PC2 8500) @ 5-7-7-20 Dual Channel Mode | |
| Hard Drive | Seagate Barracuda ES.2 ST3250310NS 250GB 7200 RPM 32MB cache SATA 3.0Gb/s | |
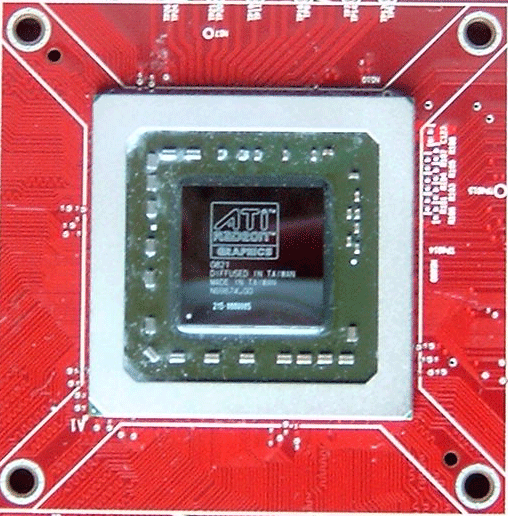
| Video Cards | SAPPHIRE Radeon HD 4850 Catalyst 8.6 |
SAPPHIRE Radeon HD 4850 @ 710 MHz core 1125 MHz (2250DDR) memory Catalyst 8.6 |
| Optical Disk Drive | Pioneer DVR-215DBK | |
| Operating System | Windows Vista Ultimate x64 | |
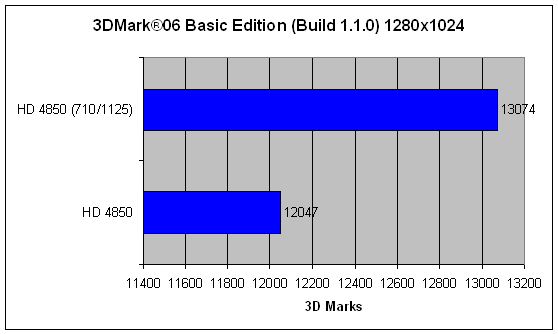

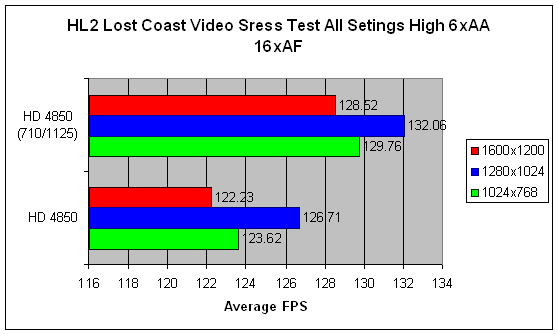
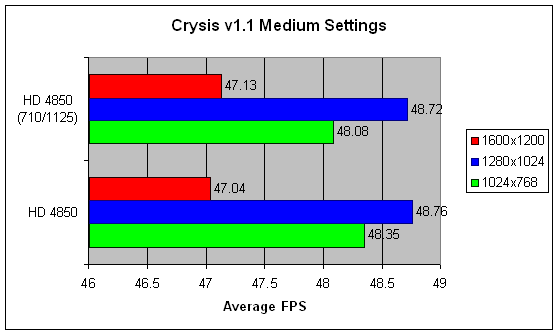
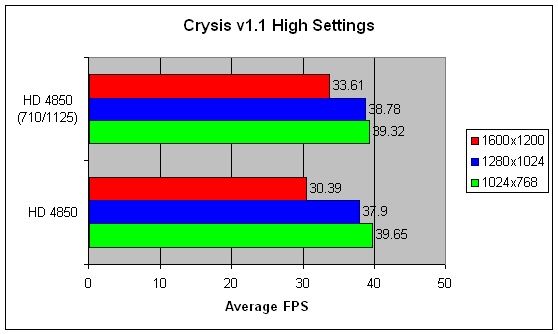
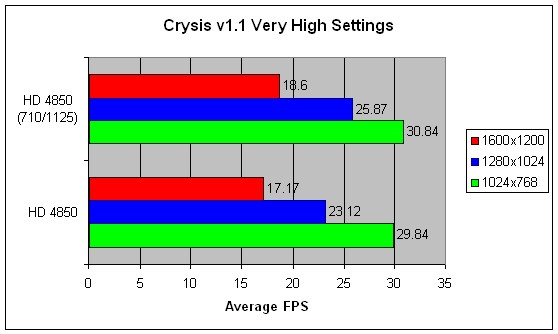
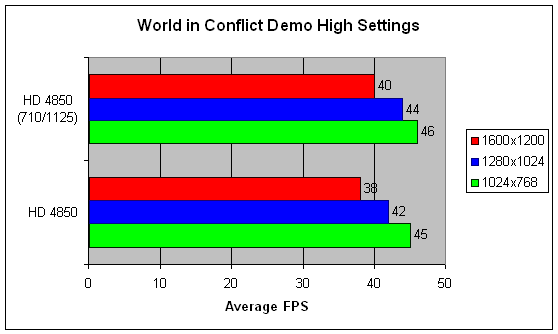
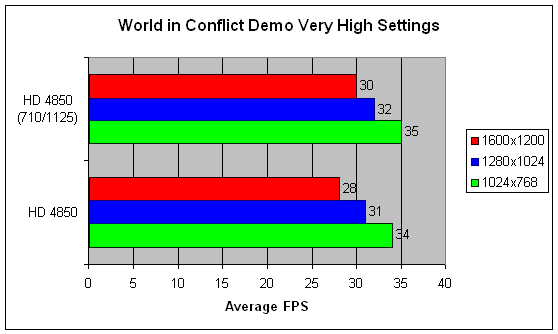
As you can see there is a slight but noticeable difference across the board using the overclocked settings. Every bit helps with Crysis.
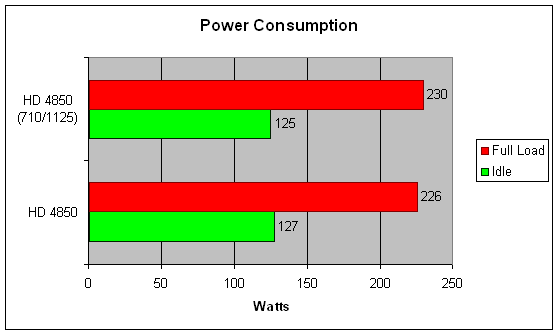
The 1.2V that was used in order to proved to let the HD 4850 consume more power at full load, but the difference in idle power consumption is most likely due to the newer BIOS used in overclocking.
If you want to get all that you can from your HD 4850 using Sapphire's "TOXIC" edition as a guide proves to be a good way to go.


